
Understanding Permissions & Groups
Control who can see and edit what in your department
Command Established uses a flexible permissions system based on roles, individual permissions, and groups. Most records are visible to every member of your department by design — permissions primarily control who can create, edit, and archive records, plus who can view a small set of restricted record types. This guide explains how it all fits together.
Quick Start
Three ways to control access:
- Roles — Assign users as Owner, Admin, or Member when they join your department.
- Permissions — Grant specific permissions to individual members (e.g., "can edit incidents").
- Groups — Create groups with shared permissions and add members (e.g., "Officers" group).
Understanding Roles: Owner, Admin, Member
Every member of your department has one of three roles. Roles determine baseline access levels before individual permissions or groups are considered.
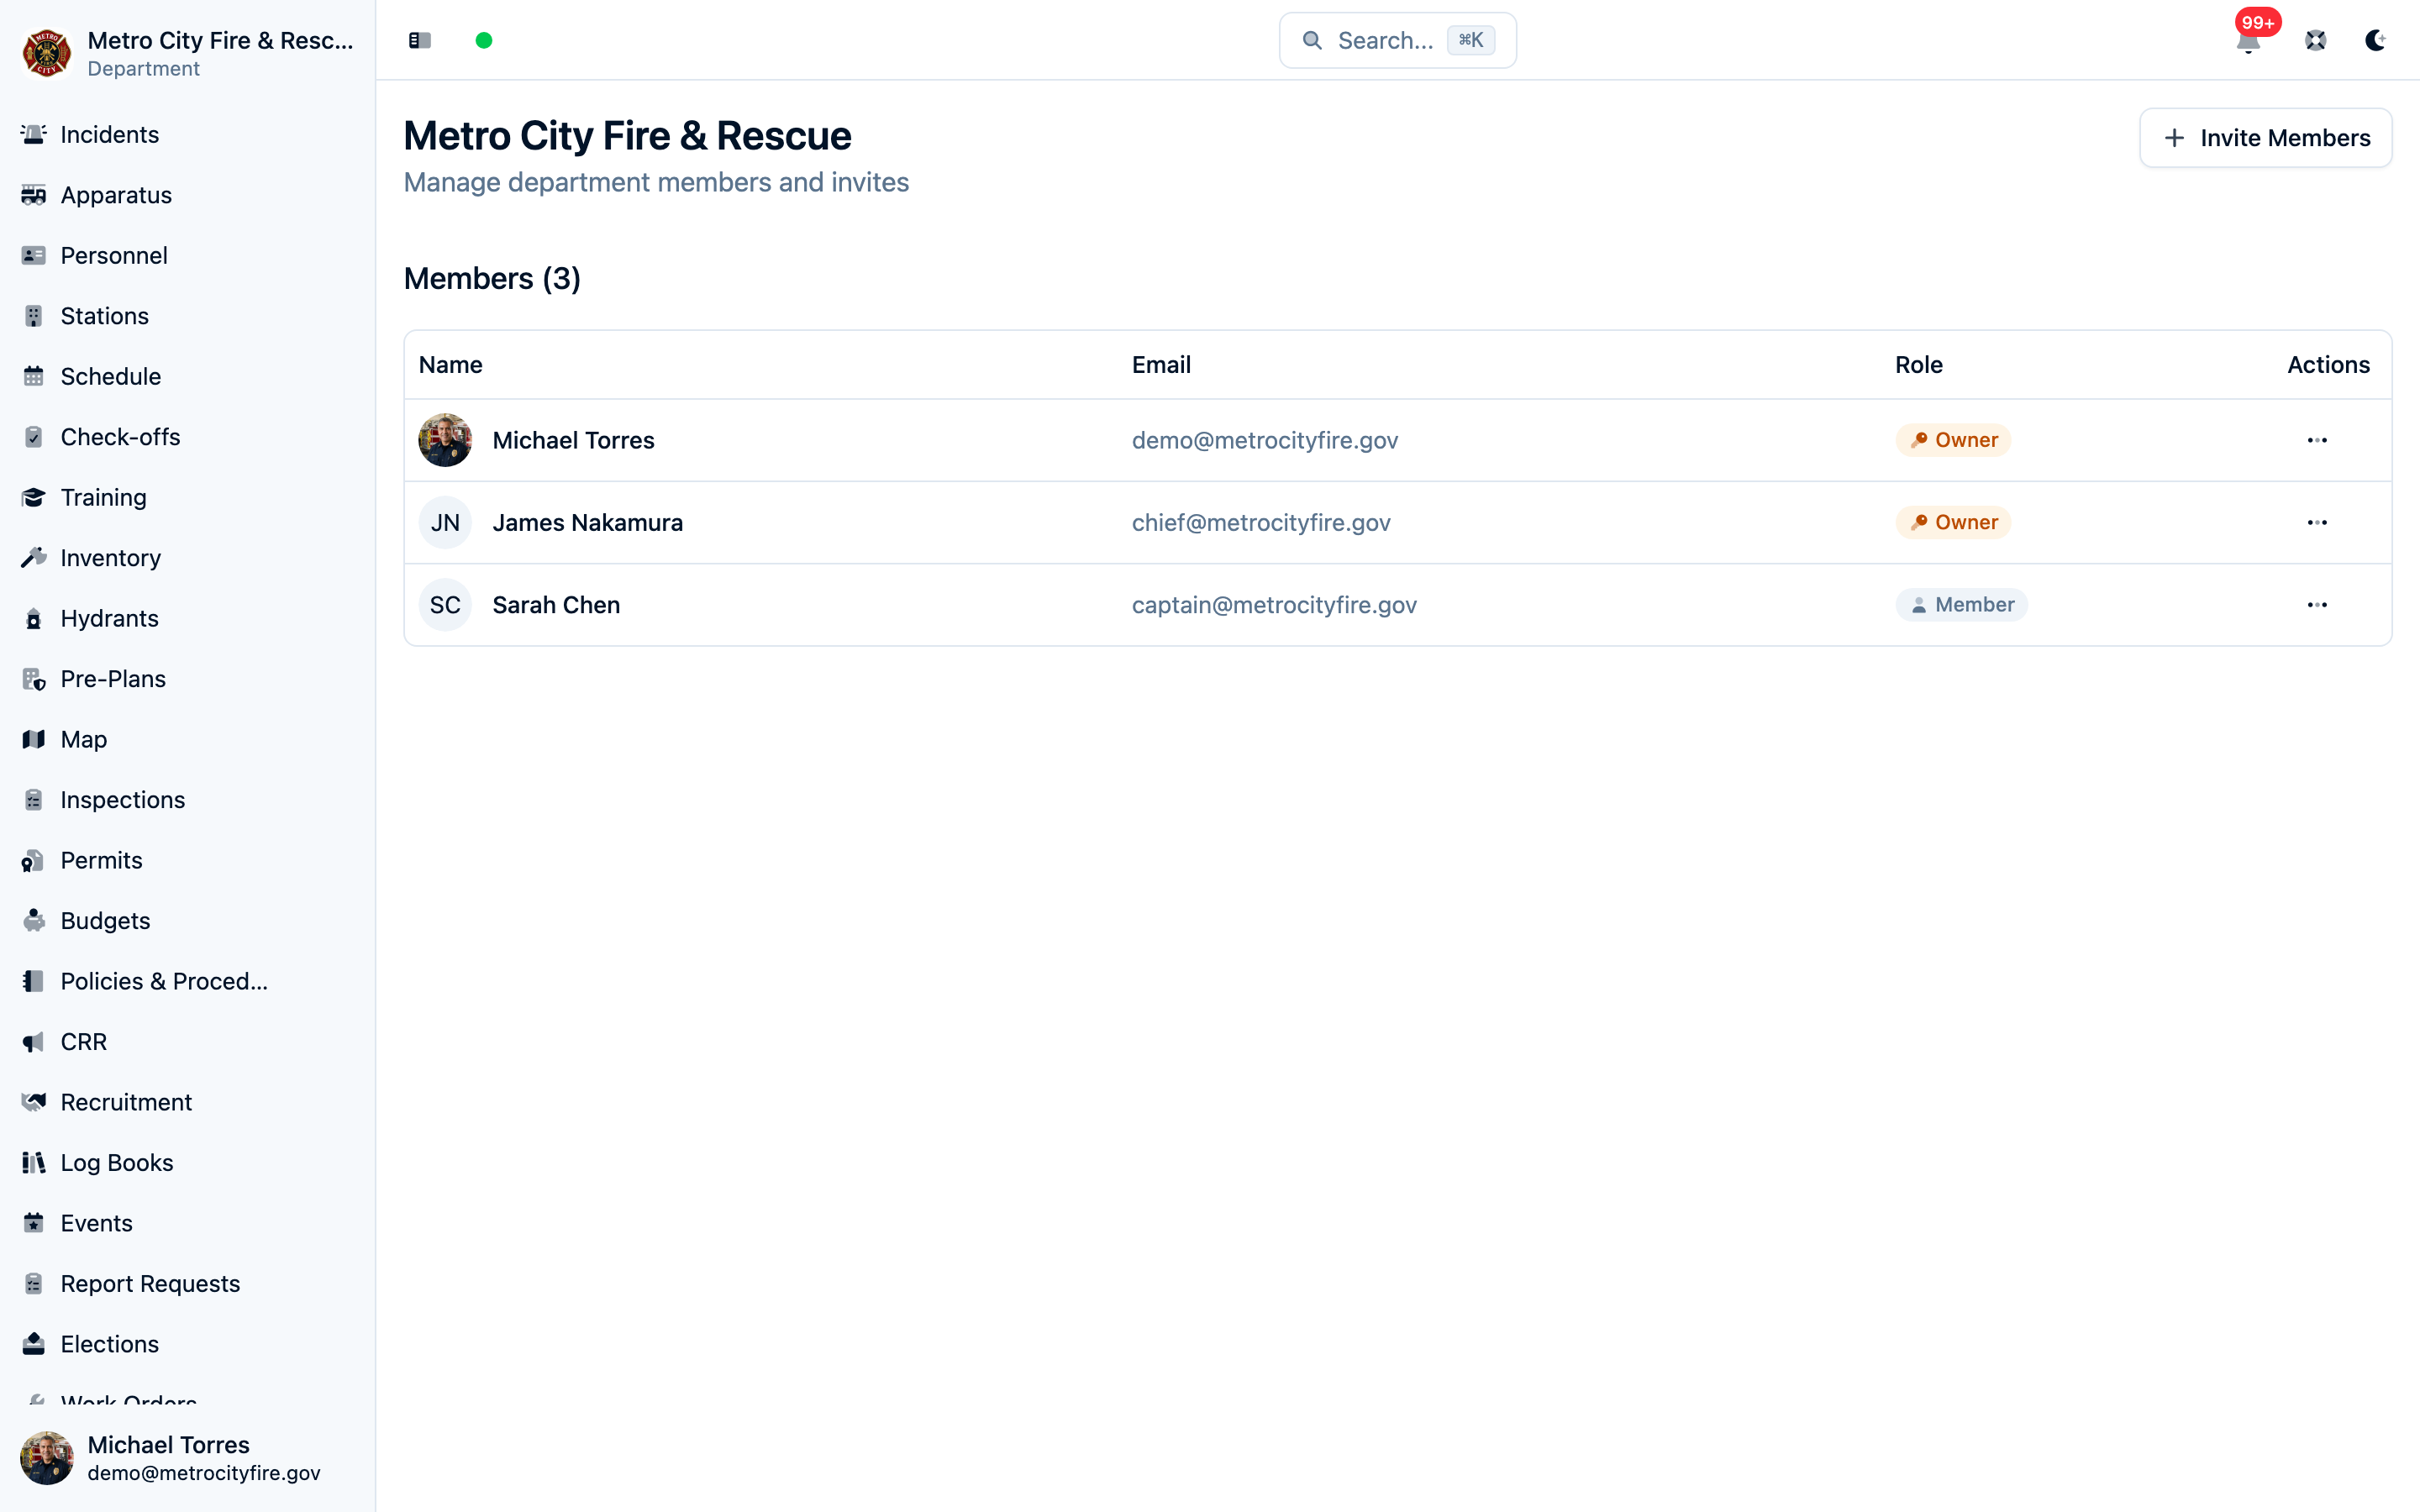
Owner
Full access to everything. Owners can see, create, edit, and delete all records. They can manage department settings, billing, and other members' permissions. There must always be at least one owner.
Best for: Fire Chief, Department Administrator
Admin
Full access to all operational data. Admins can see, create, edit, and delete all incidents, personnel, apparatus, and other records. They cannot manage department settings or billing.
Best for: Assistant Chief, Training Officer, senior officers who need full operational access
Member
Viewing is open, editing is controlled. Members can view most records automatically, but they cannot create, edit, or archive anything by default. They must be granted specific permissions (individually or through groups) to make changes — and a few restricted record types also require an explicit view permission (see "What Members Can See" below).
Best for: Most department members, firefighters, EMTs, support staff
How Permissions Work
Permissions are specific actions a member can perform on different types of records. Every permission follows the format action:entity.
Available Actions
read— View records. All members can already view most record types, so Read only needs to be granted for the restricted record types listed below (and for API keys, which always need explicit read access).create— Create new recordsupdate— Edit existing recordsarchive— Archive (soft delete) records
Record Types
Permissions can be granted for each of these record types. Types marked restricted require an explicit Read grant before a member can view them; everything else is visible to all members automatically. The permissions screen only shows record types for the modules your department has enabled.
Response
- Incidents
- Fire Investigations — restricted, with assignment-based access (see Rule 6 below)
- Fire Hydrants
- Pre-Plans
- POIs
- NERIS Submission — a single on/off permission: "can submit and update incidents with NERIS." Granting it lets a member send reports to the federal system without needing broader incident edit access.
People
- Personnel
- Certifications
- Certification Documents — restricted (see below)
- Fit Tests
- Applications — restricted; recruitment applications contain applicant personal information, and this permission also covers managing application forms
Training & Events
- Trainings
- Events
- Elections — controls managing elections (creating, opening, closing). Casting a ballot never requires a permission; any eligible member can vote.
Equipment & Facilities
- Apparatus
- Stations
- Inventory
- Work Orders
- Check-offs — performing check-offs and managing completed records
- Check-off Templates — authoring the checklist definitions members check off against
Prevention & Community
- Inspections
- Inspection Locations
- Permits — restricted; permits contain applicant contact information and addresses
- Permit Types, Permit Forms, and Fee Schedules — non-sensitive configuration, visible to all members
- Permit Invoices — restricted; invoices contain billing contact information and payment history
- Community Risk Reduction
- Report Requests — restricted; report requests contain requester personal information, incident details, and records-fee invoices
Administration
- Budgets — restricted; budgets contain department financial data (line items, expenses, revenues) and this permission also covers grants
- Log Books & Log Entries — see "Log Books & Log Entries" below for their special editor rules
- Policies & Procedures — all members can view; creating, editing, and archiving policies can be granted like any other record type
Permission Examples
create:incident— Can create new incident reports. Bonus: Can also edit incidents they created (but cannot archive them).update:incident— Can edit any incident report (unless it's locked or assigned to someone else).read:budget— Can view budgets, expenses, revenues, and grants. Without this grant (or budget edit access), a member cannot see financial records at all.archive:apparatus— Can archive (soft delete) apparatus records. Archived records are hidden from lists but preserved for audit history.
What Members Can See
Most records are visible to all members
Every active member can view most record types — incident lists, apparatus, stations, trainings, inventory, and so on — without any permission being granted. In the permissions screen this shows up as a checked, locked Read checkbox labeled "All members can view." Permissions govern who can make changes, not who can look.
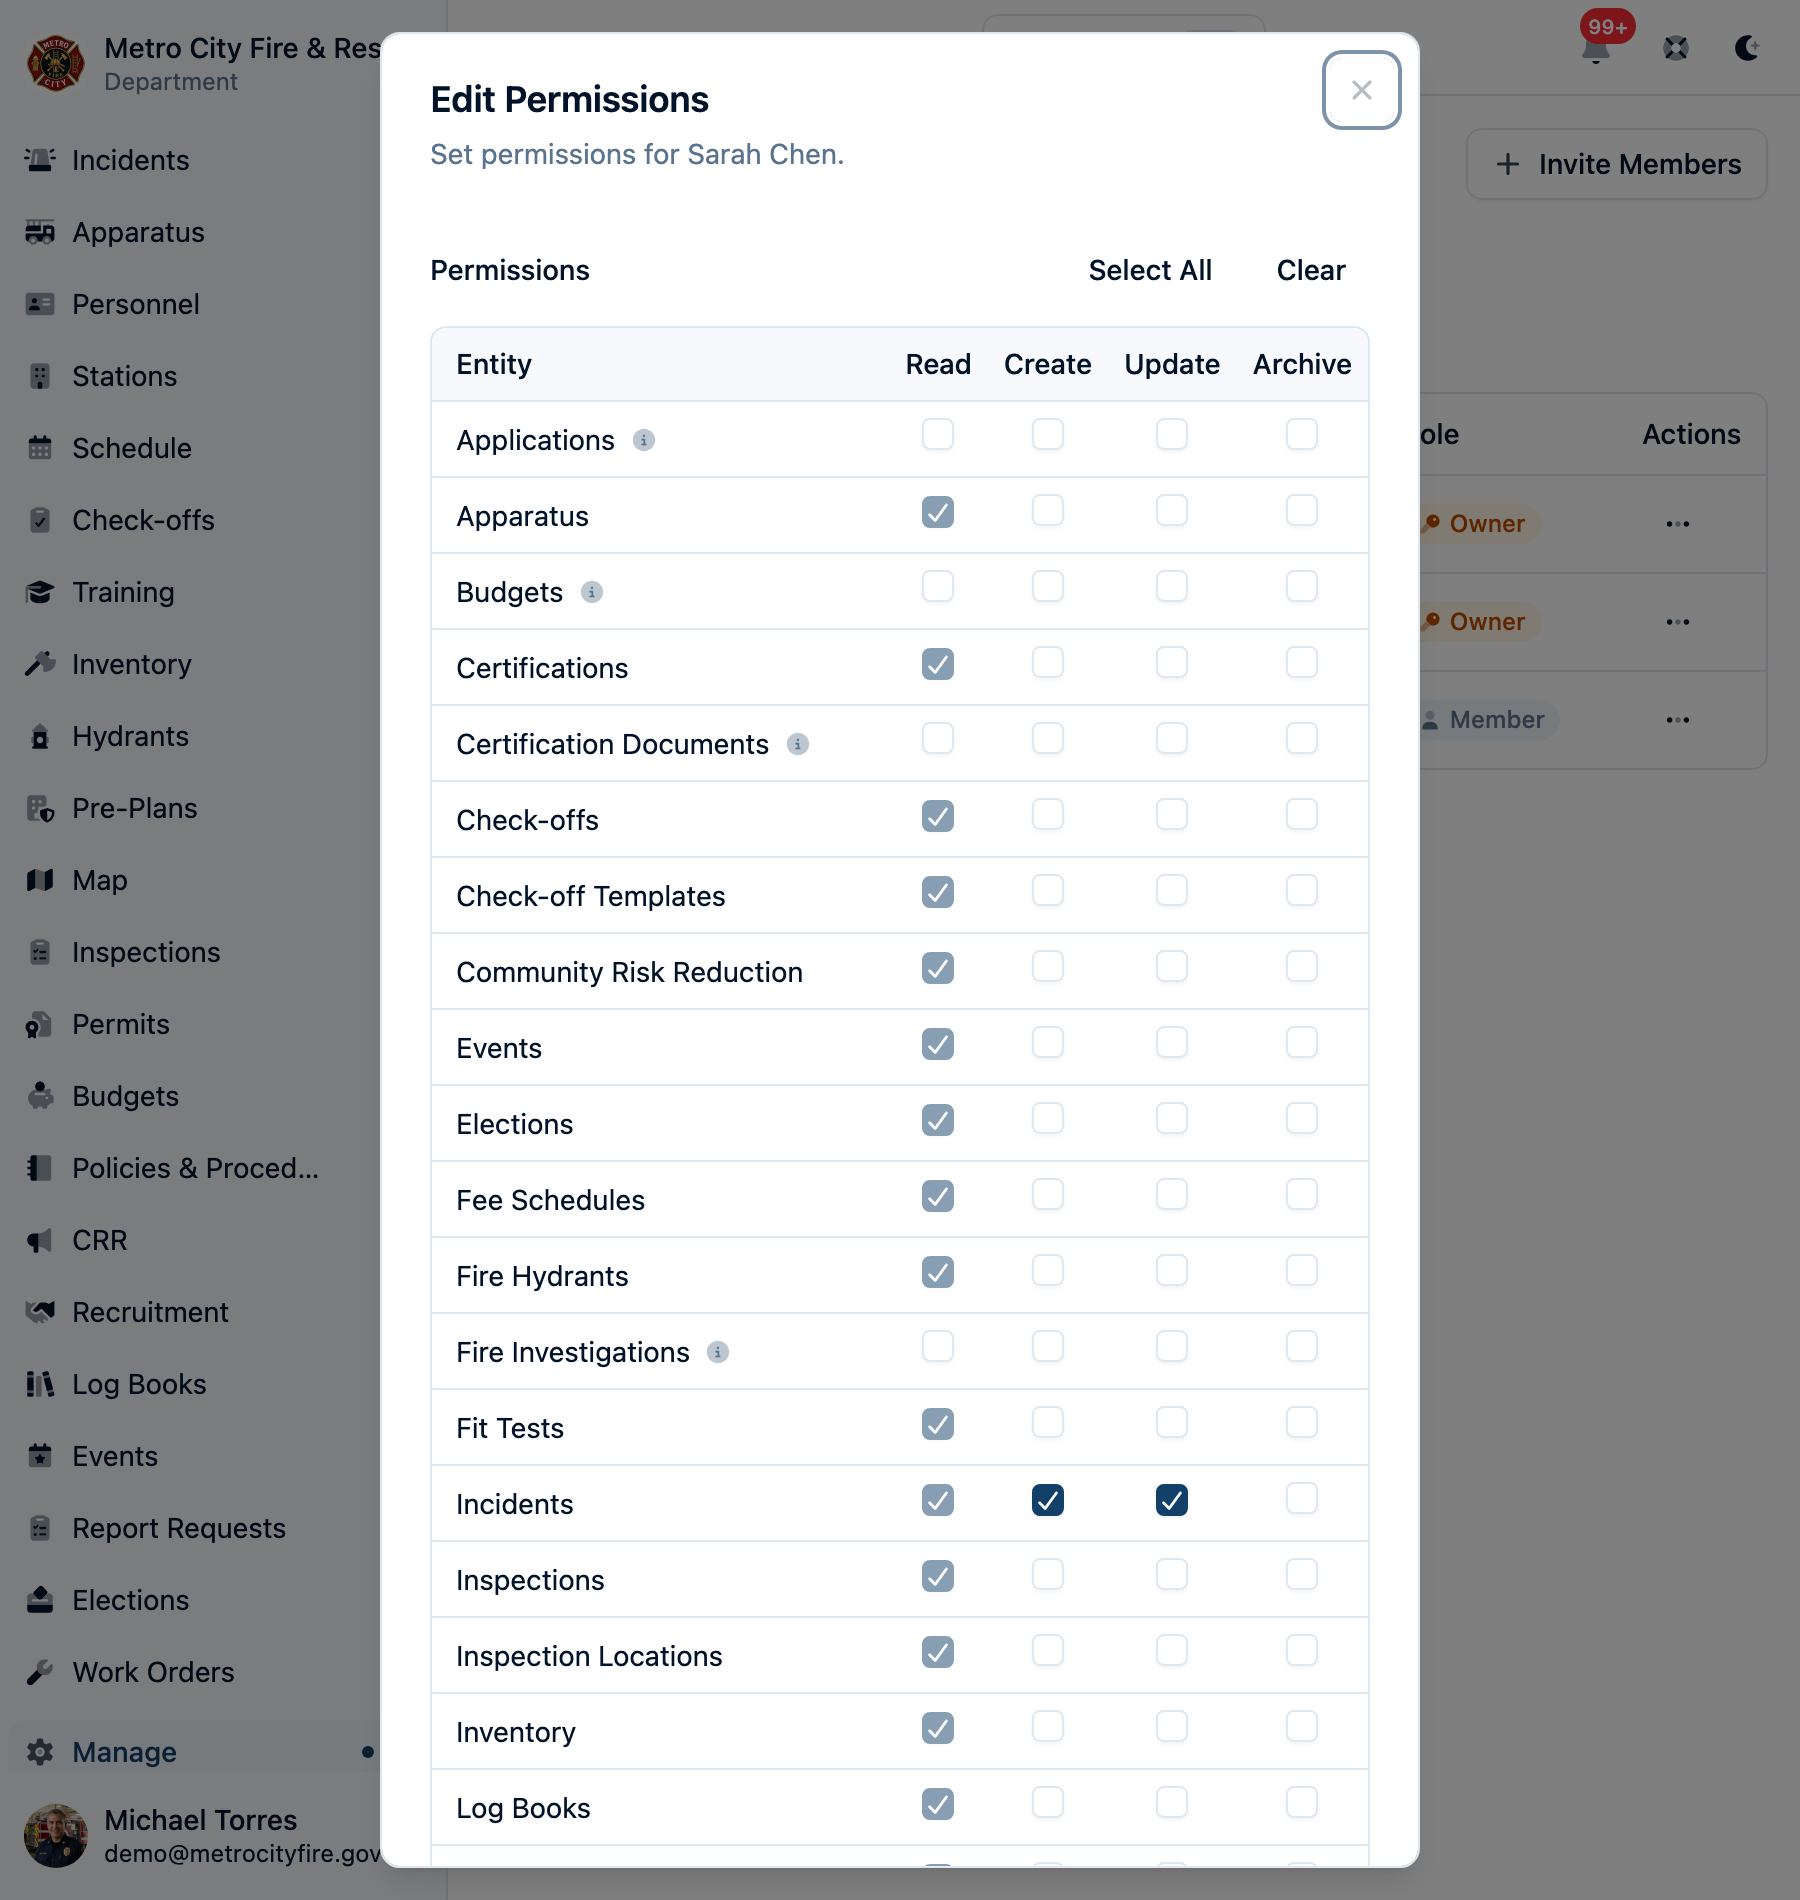
Two exceptions: restricted record types (below) and restricted incident fields (see the incident rules).
Restricted record types
A small set of record types carry sensitive personal or financial information, so members must be granted explicit Read access (individually or through a group) before they can view them:
- Fire Investigations — case files can contain criminal, juvenile, and suspect information. Investigations also have assignment-based access with no permission needed — see Rule 6 below.
- Applications — recruitment applications contain applicant personal information (contact details, uploaded documents).
- Budgets — department financial data, including grants.
- Permits — applicant contact information and addresses. (Permit types, forms, and fee schedules stay visible to everyone.)
- Permit Invoices — billing contact information and payment history.
- Report Requests — requester personal information, incident details, and records-fee invoices.
- Certification Documents — uploaded credential files and their extracted contents.
A few helpful rules apply to restricted types:
- Edit access includes view access. If a member can create, update, or archive a restricted record type, they can automatically view it too — the permissions screen shows this as a checked, locked Read box labeled "Implied by write access."
- Permit invoices include permits. Any permit-invoice permission also grants view access to permits, since every invoice bills a specific permit. The reverse is not true — someone who can view permits cannot see billing details.
- Certifications have two tiers. The certification roster — who holds which credential, certificate numbers, issuing authorities, and expiration dates — is visible to all members. Only the documents tier (uploaded files and their contents) is restricted. And every member can always see the documents for their own certifications, regardless of permissions.
Special Permission Rules
Some permissions have special behavior to support common workflows:
Rule 1: "Create" Grants Edit on Your Own Records
If you have create:incident, you can also edit incidents you created (but you cannot archive them without explicit archive:incident permission).
Example: A firefighter with
create:incidentcan write an incident report and make corrections to their own report, but they can't edit reports written by others.
Rule 2: Assignment Controls Who Edits an Incident
If you're assigned to an incident (in the "Assigned To" field), you can edit that incident even without update:incident permission. Assignment also works the other way: once an incident has assignees, only the assignees (plus Owners and Admins) can edit it — even members with update:incident are locked out until the assignment is cleared.
Example: An officer assigns an incident report to a firefighter for completion. That firefighter can now edit the assigned incident, and other members with edit permission can't step on their work while it's assigned.
Rule 3: Locked Incidents Are Owner/Admin Only
Once an incident is approved and submitted to NERIS, it becomes locked. Only Owners and Admins can edit locked incidents.
Why? Once submitted to NERIS, the federal system has a copy. Edits should be carefully controlled to maintain data integrity and audit trail.
Rule 4: You Can Always Edit Your Own Personnel Record
Every member can view and edit their own personnel record (certifications, contact info, etc.) regardless of permissions. Admins and Owners can edit all personnel records.
Rule 5: Incident Fields Are Split into Public and Restricted
All members can see an incident's public fields: address, nature of call, timeline, and assigned personnel. Restricted fields — narrative details, cause determination, and full NERIS data — are only visible to members who can edit that incident (via assignment, having created it, or update:incident).
Rule 6: Fire Investigation Access Follows the Case Assignment
Fire investigations are a restricted record type, but being named on a case grants access automatically: the lead investigator and any assigned investigators can view and edit their own cases without any permission grant. A member with read:fire-investigation — or any investigation write grant, since edit access includes view access — can view all of the department's investigations. Members with no investigation grants see only the cases they're assigned to. Archiving an investigation always requires the explicit archive:fire-investigation permission.
Example: A department can run investigations without granting most members any investigation permissions — an Admin opens the case and assigns investigators, and each investigator sees only their own case files. If you instead delegate case-opening by granting a member
create:fire-investigation, keep in mind that grant also lets them view every investigation in the department, not just the ones they open.
Log Books & Log Entries
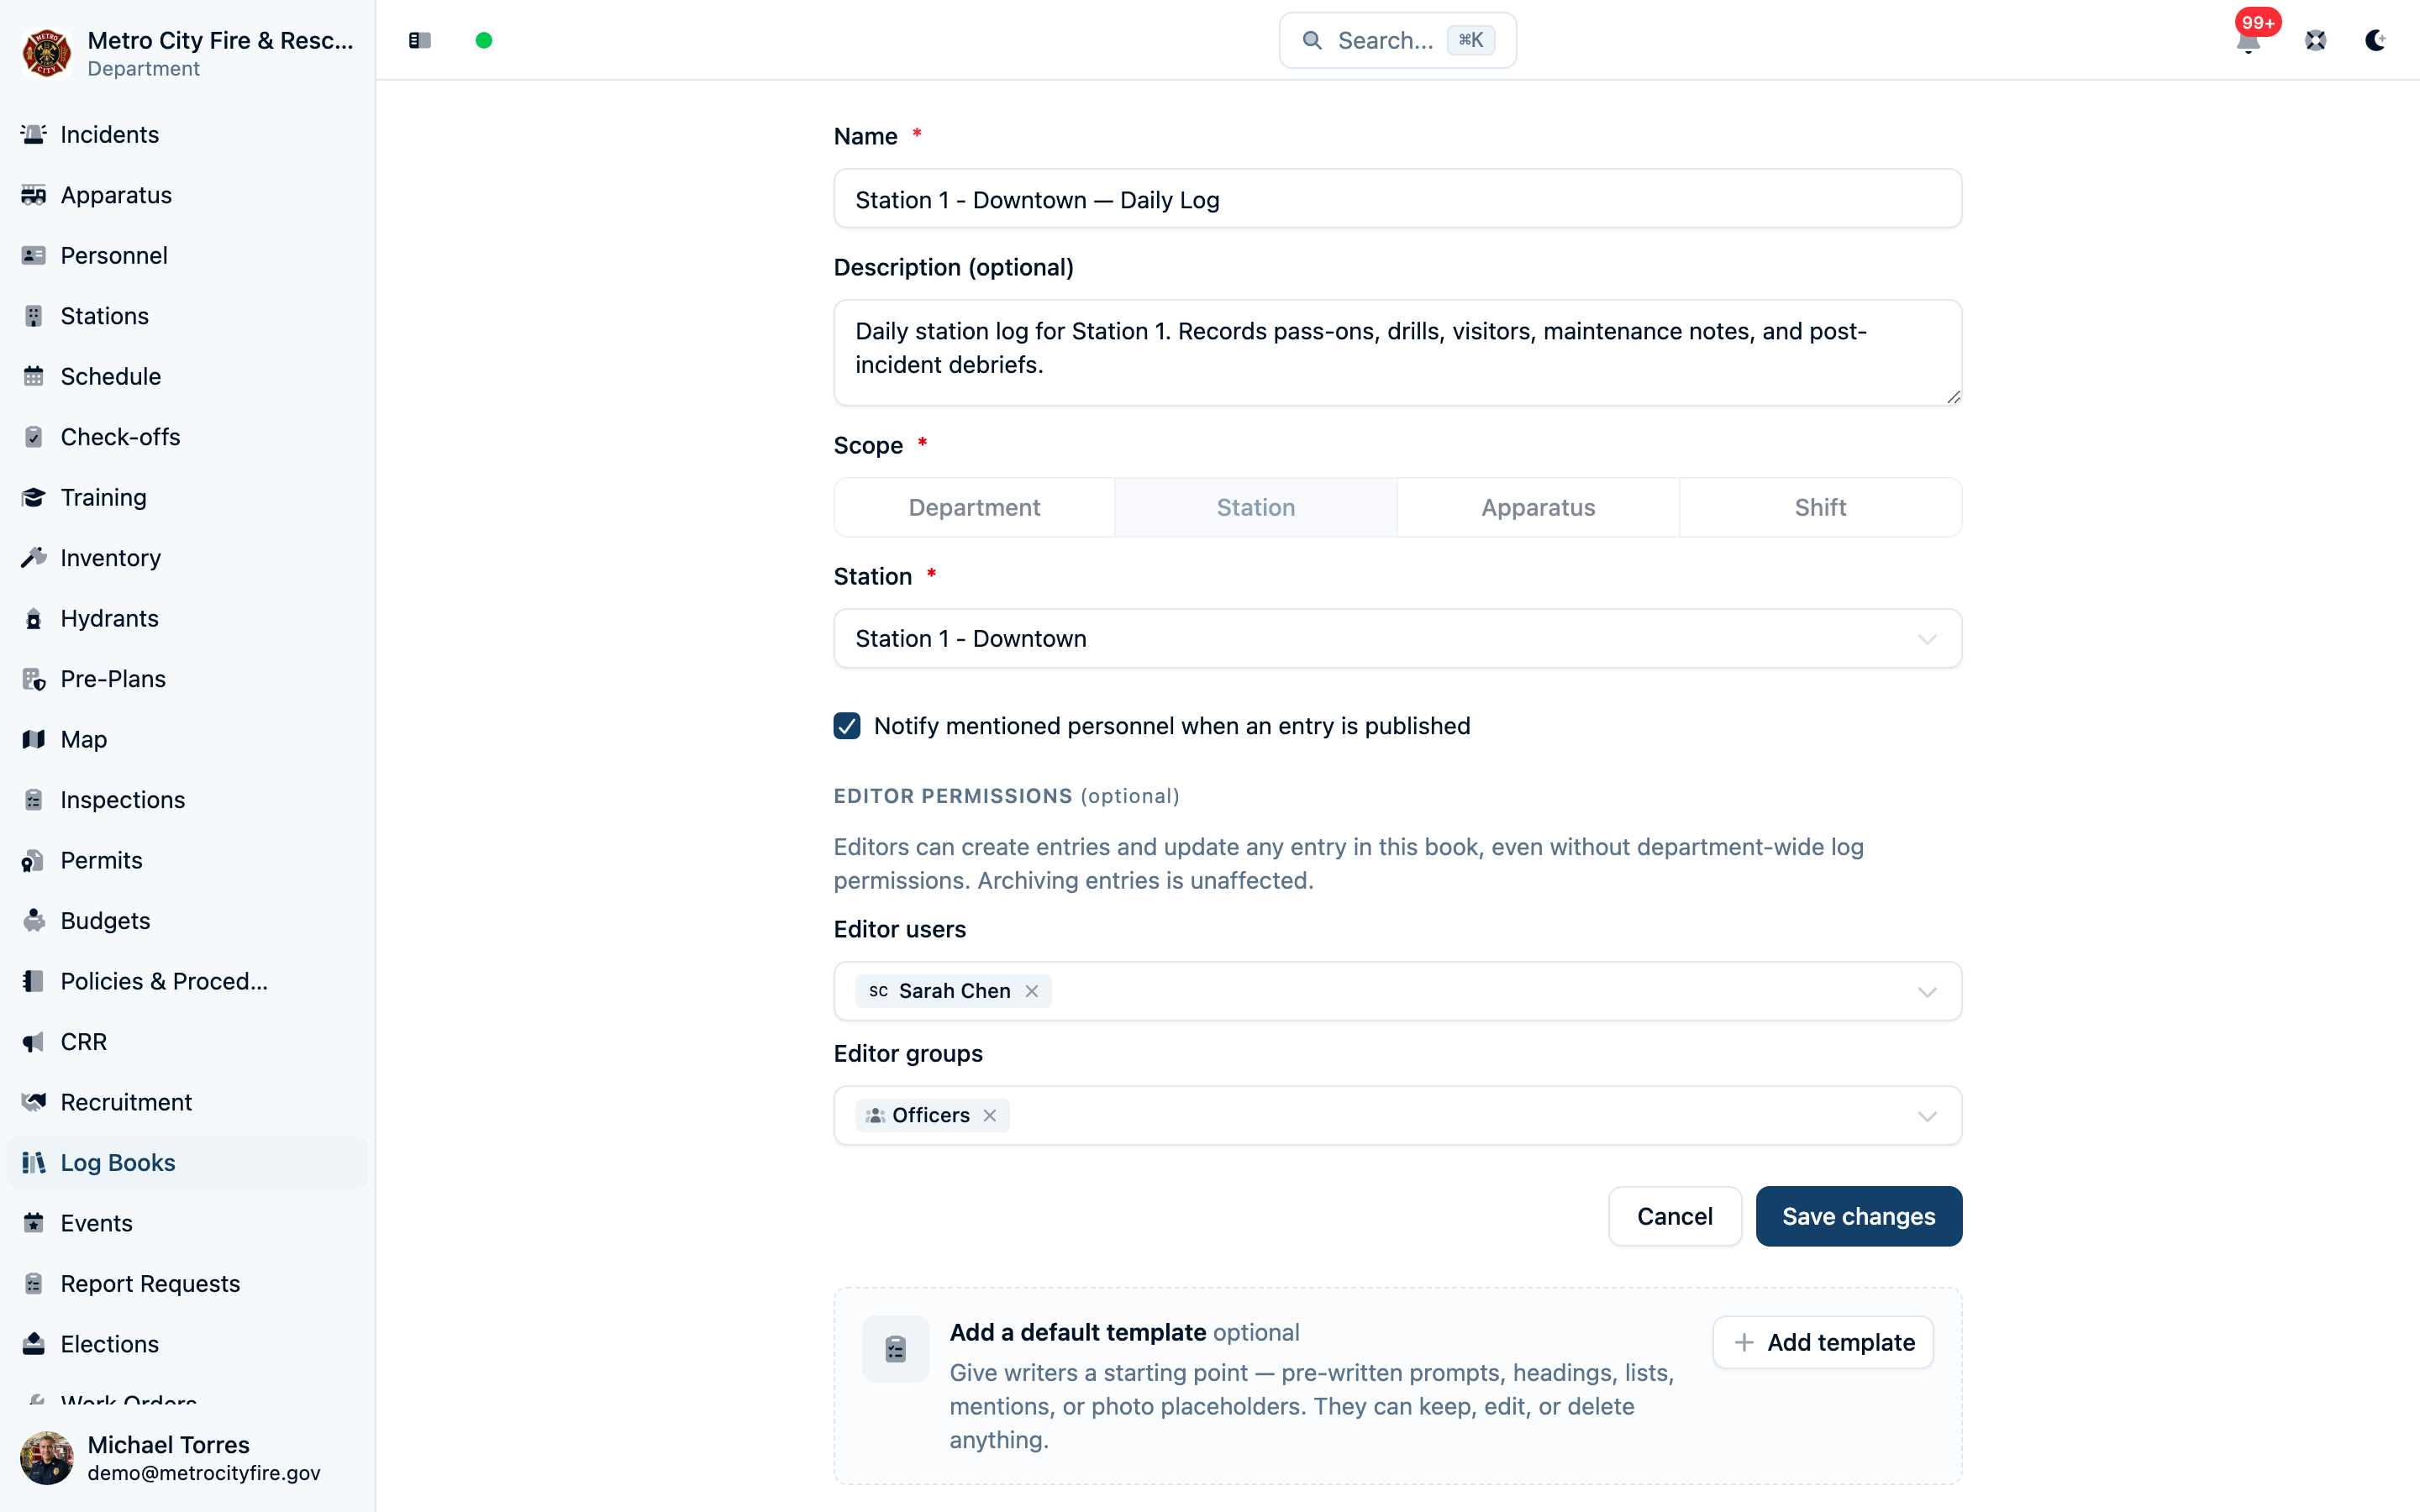
Log books have their own editor model, designed for station journals and daily logs that everyone should be able to read but only designated people should write in.
- Everyone can read. All members can view log books and their entries — no permission needed.
- Two ways to write entries. A member can create and edit entries in a book if they hold the department-wide log entry permissions (
create:log-entry/update:log-entry), or if they're listed as an editor of that specific book. Each log book has its own editor list of members and groups, so you can let a station's crew write in the station log without opening every book department-wide. - Only Owners and Admins manage editor lists. Setting who can write in a book is an admin action, even for members who can otherwise edit the book's details.
- Authors can edit their own entries. A member with
create:log-entrycan edit entries they wrote (the same rule as incidents), but not entries written by others. - Archiving is separate. Archiving a log book or entry always requires the explicit archive permission — being a book editor isn't enough. Archived books remain readable for record-keeping, but their entries can no longer be edited.
Using Groups to Simplify Permissions
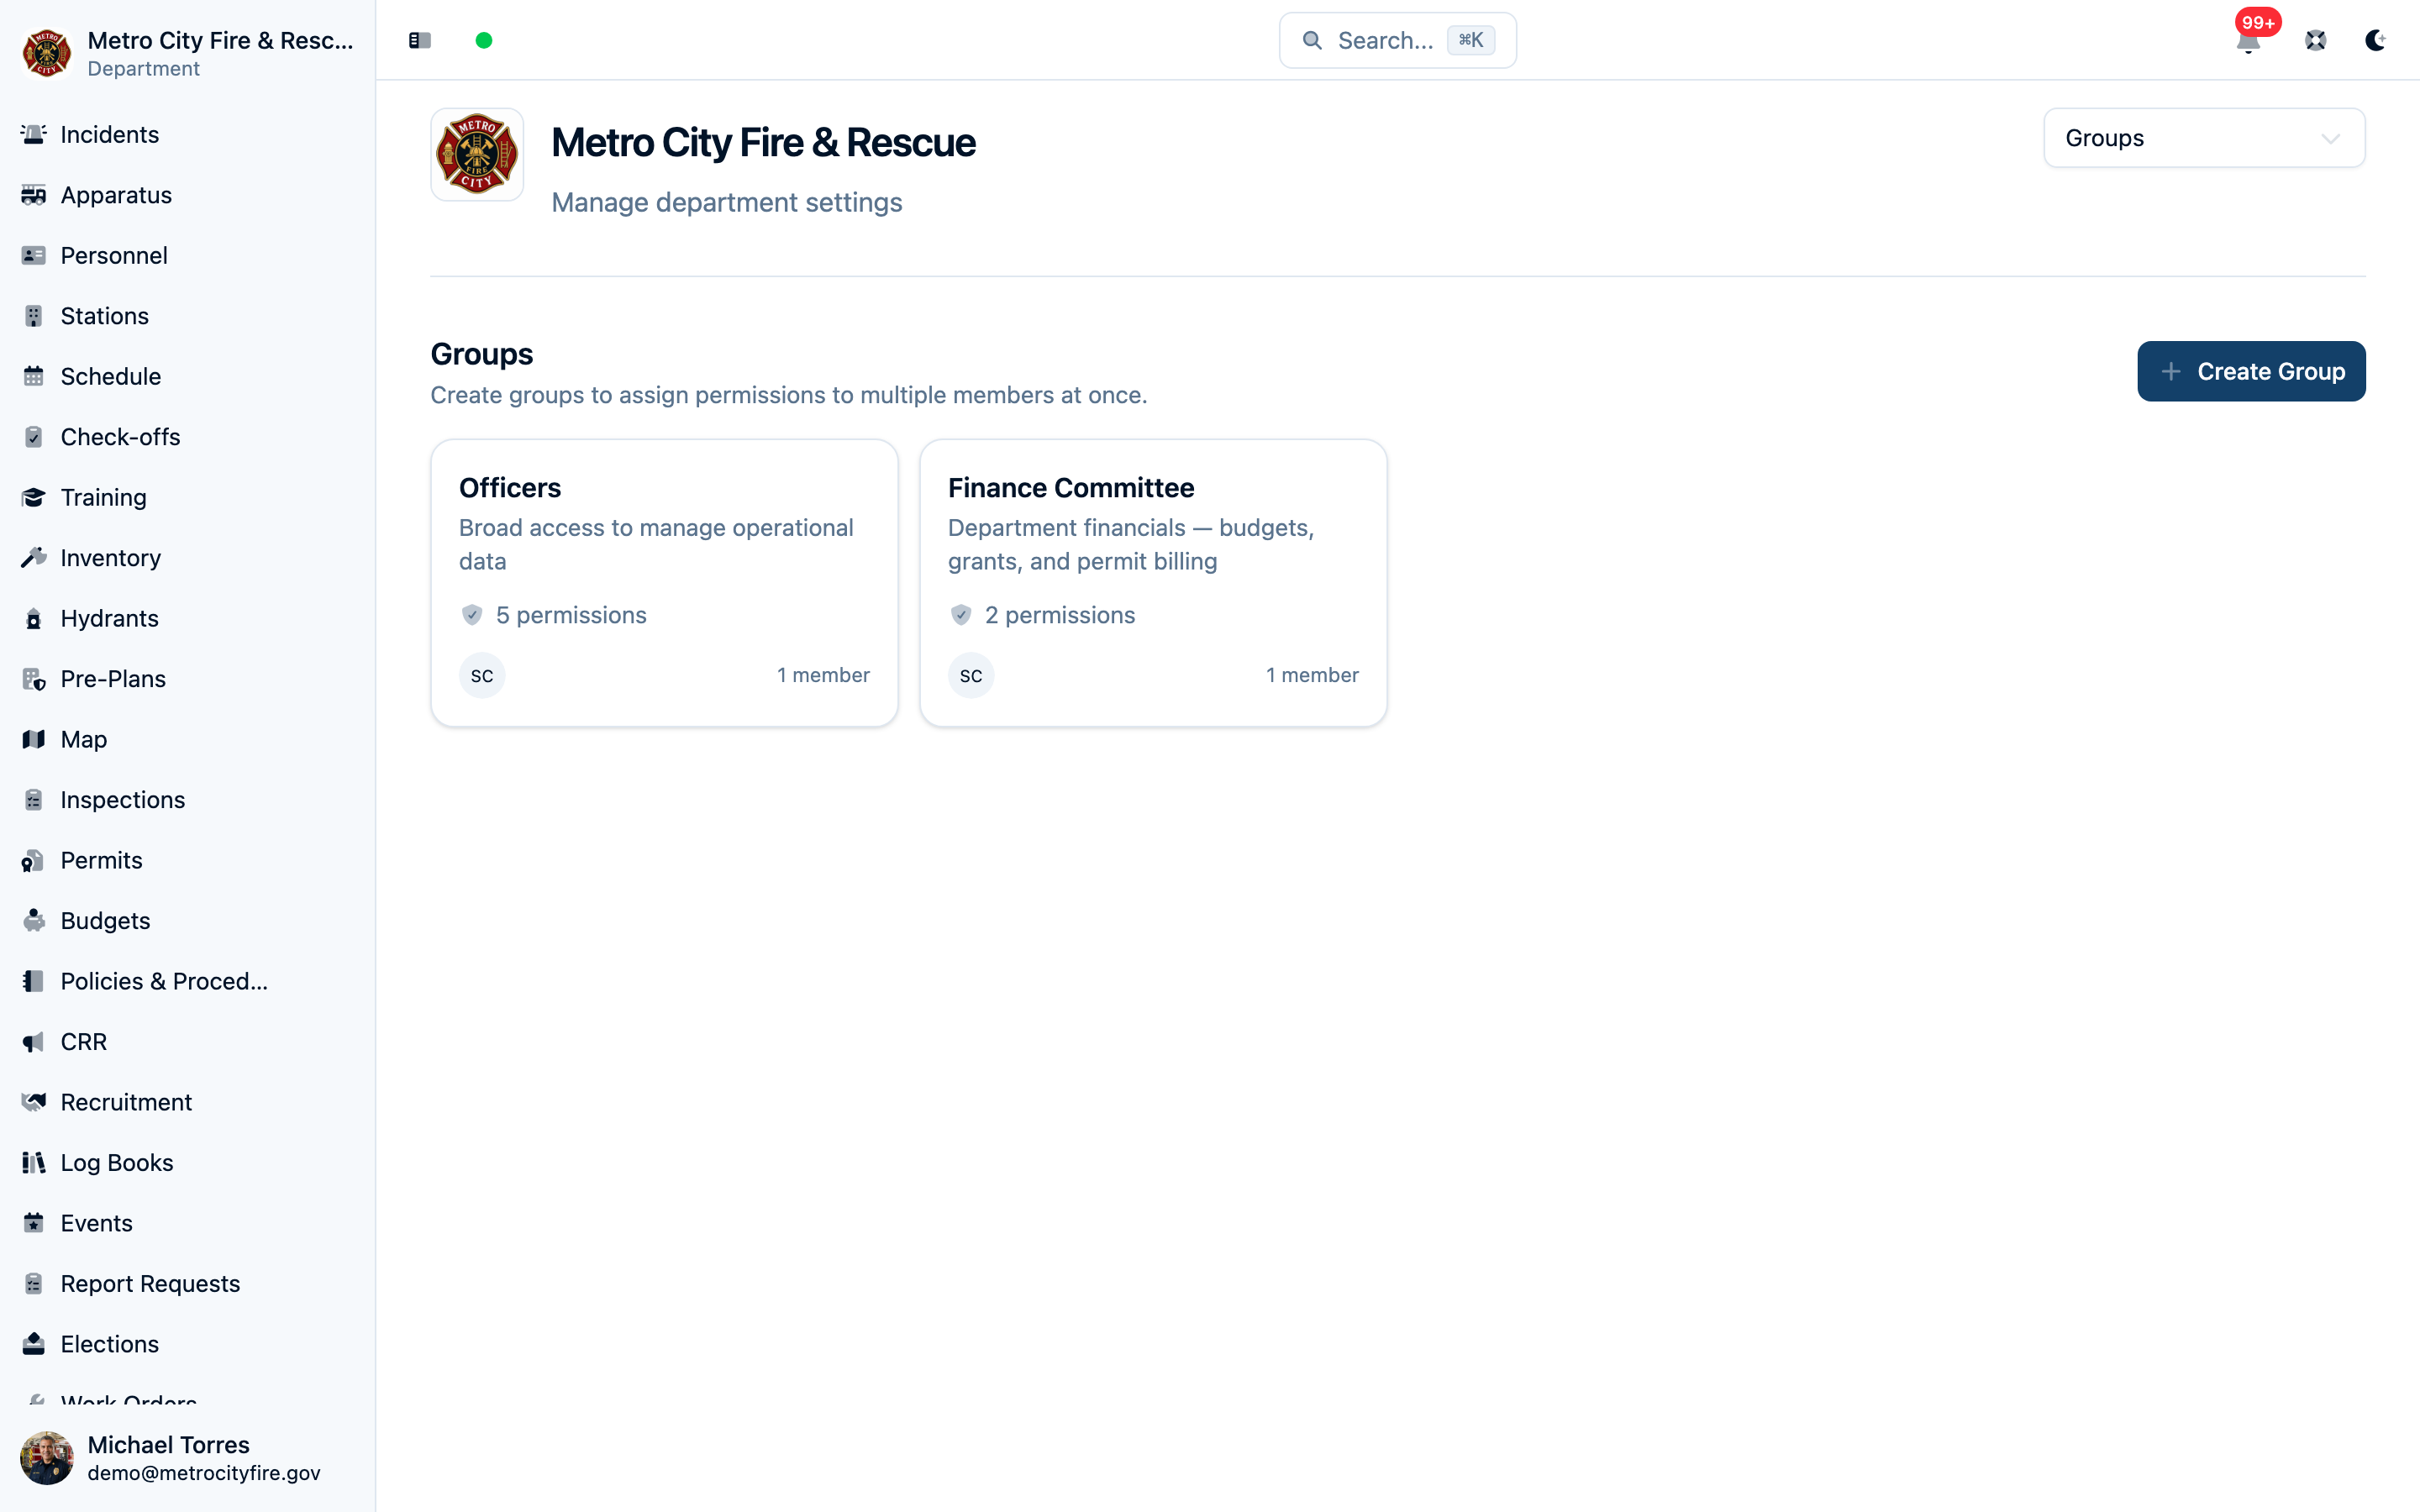
Instead of assigning permissions to members one-by-one, create Groups with shared permissions and add members to the group. When you update the group's permissions, all members inherit the change.
How Groups Work
- Create a group (e.g., "Officers") and assign it permissions
- Add members to the group
- Members inherit all permissions from the group (stacked on top of individual permissions)
Example Group Setups
Example: "Officers" Group
Purpose: Give officers broad access to manage operational data
Permissions:
create:incidentupdate:incidentupdate:personnelupdate:apparatusupdate:station
Result: Officers can create and edit incidents and keep personnel, apparatus, and station records up to date. (Viewing these records doesn't need a grant — all members can already see them.) They cannot archive records or manage department settings.
Example: "Training Staff" Group
Purpose: Give training officers access to manage trainings and personnel certifications
Permissions:
create:trainingupdate:trainingarchive:trainingupdate:personnelread:certification-document
Result: Training staff can create, edit, and archive training records and update personnel to add certifications. The read:certification-document grant lets them view every member's uploaded credential files — a restricted record type that other members can only see for themselves.
Example: "Incident Reporters" Group
Purpose: Let firefighters write incident reports they can maintain themselves
Permissions:
create:incident
Result: Members can write new incident reports and edit their own reports. Like all members, they can see the incident list and public incident fields, but restricted fields (narratives, cause determination) are only visible on incidents they can edit — their own, or ones assigned to them.
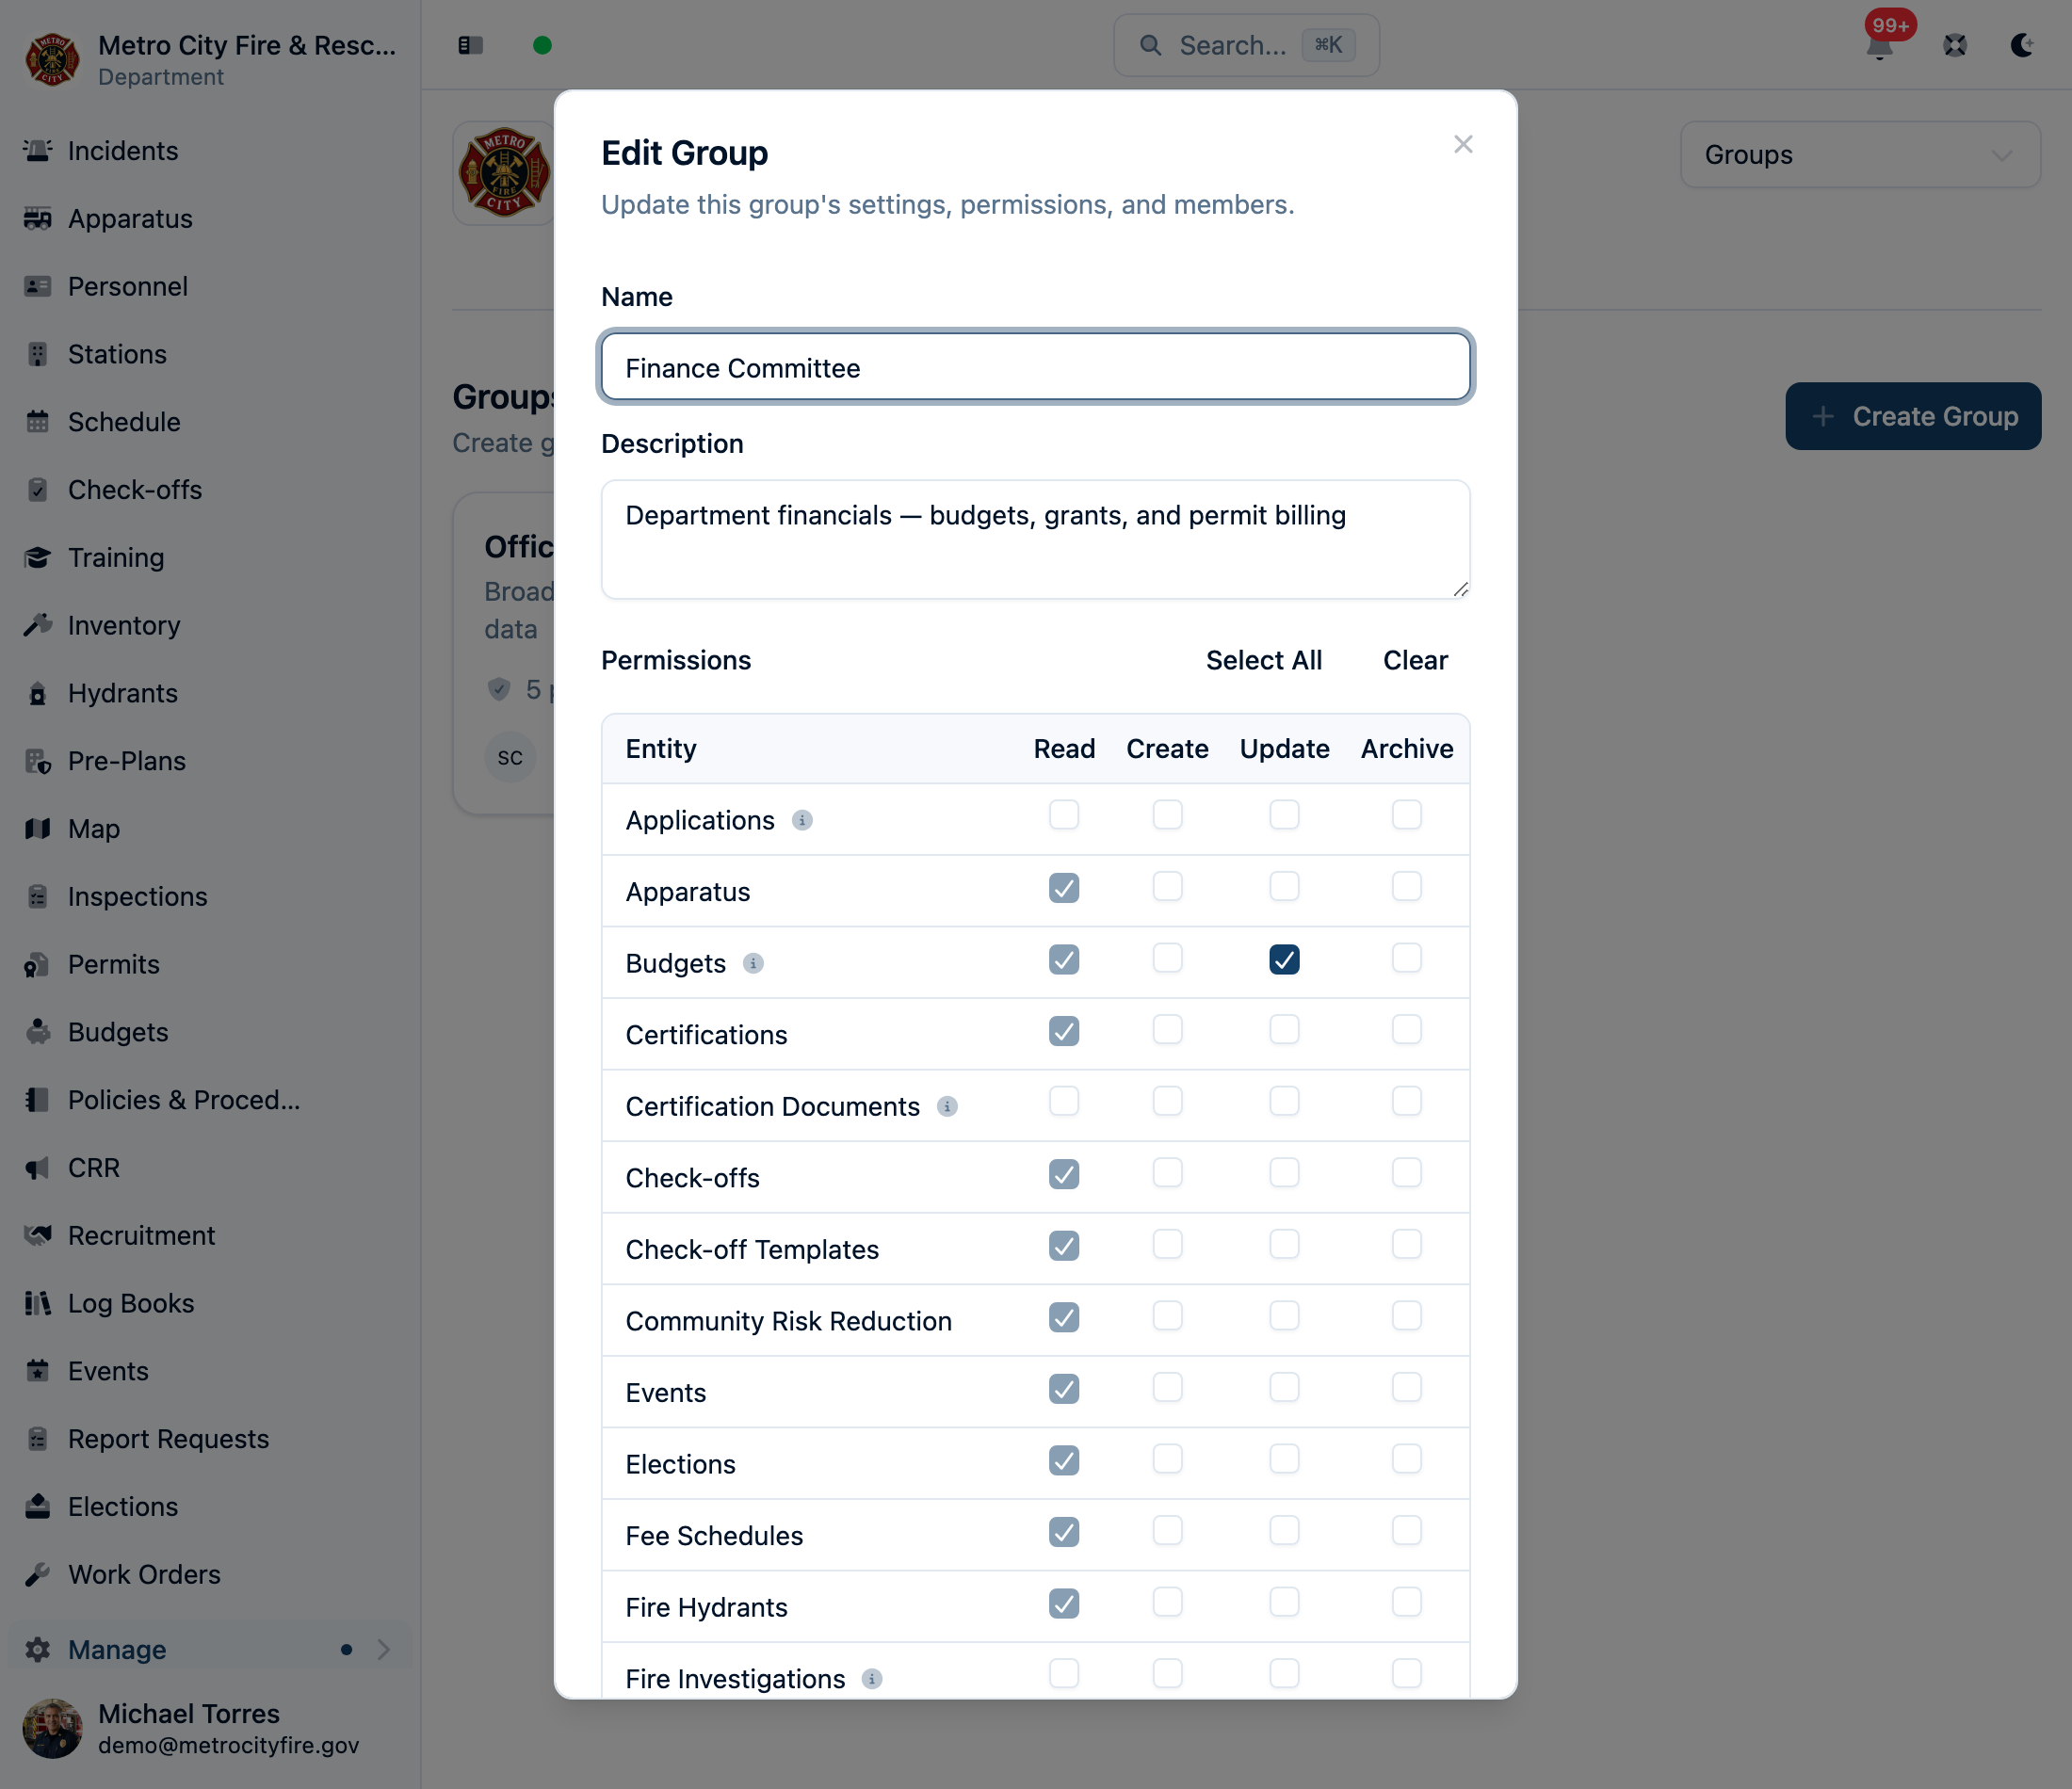
Example: "Finance Committee" Group
Purpose: Give trustees or a finance committee access to department financials
Permissions:
read:budgetupdate:budgetread:permit-invoice
Result: Committee members can view and edit budgets, expenses, revenues, and grants, and view permit billing — all restricted record types that other members can't see at all. (The update:budget grant alone would already include viewing; the explicit read:budget just makes the intent clear.)
Best Practices for Managing Access
- Start restrictive, expand as needed — Begin with minimal permissions and add more based on role requirements. It's easier to grant access than to revoke it.
- Use groups for common roles — Create groups for Officers, Training Staff, Incident Reporters, etc. This makes permission management scalable as your department grows.
- Limit archive permissions — Archiving hides records from everyday lists (they're preserved for audit history). Only grant
archive:*permissions to trusted members. - Review permissions regularly — When members change roles or leave the department, review and update their permissions. Use deactivation for members who leave temporarily.
- Use assignment for workflow — For incidents that need review or completion, assign them to specific members. Assigned members can edit without broad
update:incidentpermission, and the assignment protects the report from other editors until it's done. - Use log book editor lists — For station journals, name the members or groups who should write in each book instead of granting department-wide log entry permissions.
- Document your permission structure — Keep a record of which groups have which permissions and why. This helps when onboarding new members or troubleshooting access issues.
Common Questions
Can a member be in multiple groups?
Yes! Members can be in multiple groups. They will inherit permissions from all groups they belong to, plus any individual permissions assigned directly to them. Permissions are additive.
What happens if I give someone both individual permissions and group permissions?
Both apply. Permissions are additive, so the member will have all permissions from their individual assignment and all permissions from their groups.
Can I prevent specific members from seeing certain records?
Only for restricted record types. Most records — incidents, apparatus, trainings, inventory, and so on — are visible to every member by design, and that can't be turned off per member. The restricted types (fire investigations, applications, budgets, permits, permit invoices, report requests, certification documents) work the other way: members can't see them unless you grant Read access. Incidents additionally hide their restricted fields (narratives, cause) from members who can't edit them.
Why is a Read checkbox checked and locked in the permissions screen?
Two reasons. For most record types, the locked checkbox labeled "All members can view" reflects that viewing is open to everyone — there's nothing to grant or revoke. For restricted record types, a locked checkbox labeled "Implied by write access" means the member's create, update, or archive grant already includes viewing, so unchecking Read wouldn't actually remove access.
What are "public" vs "restricted" incident fields?
All members can see public fields like address, nature of call, timeline, and assigned personnel. Restricted fields like narrative details, cause determination, and full NERIS data are only visible to members who can edit the incident (via assignment, having created it, or update:incident).
How do I set up permissions for a new member?
Follow these steps:
- Invite the member to join your department
- Assign them a role (Owner, Admin, or Member) based on their responsibilities
- If they're a Member, add them to relevant groups (e.g., "Officers", "Training Staff")
- Optionally, grant individual permissions if they need access beyond their groups
Can I change someone's role after they join?
Yes. Owners can change any member's role. Navigate to Department Settings → Members, find the member, and update their role. Be cautious when changing roles: promoting someone to Admin or Owner gives them full access to all records.
What's the maximum number of members I can add to a group?
Groups can have up to 200 members. If you need larger groups, consider creating multiple groups with similar permissions.
Need Help?
If you're having trouble setting up permissions or need help designing a permission structure for your department, reach out to our support team. We're happy to help you configure access controls that work for your organization.